Friday, February 25, 2011

Lemon Prune Tart


I was in search of a delicious dessert using prunes- because old folks eat them all the time, and we always have tons in the dried fruit box. I came across a recipe for a lemon prune tart- sounded yummy, so I put it on the menu. When the time came to put it together, I realized how odd the recipe was, that I didn't have the time or the resources to make it, and so I came up with my own.

I used the custard from the "Fresh Lemon Bar" recipe in Cookies at the Academy (only the best cookie cookbook ever!), with a different crust, adapted it into pie form and added prunes. It turned out really good, and because it's such a good lemon bar recipe, you could make it with or without the prunes, or use another fruit instead.

Lemon Prune Tart
Makes 4 pies

Crust:
4 1/2 cups flour
2 cups powdered sugar
2 1/4 cups butter

Custard:
16 eggs
8 cups granulated sugar
1 1/2 cups lemon juice
zest of 4 lemons
dried prunes

confectioners' sugar for topping pies

Preheat oven to 375 degrees F.

Combine ingredients for crust in an electric mixer bowl and mix until a soft dough forms. Divide evenly between pie pans and press onto bottom and sides. Bake at 370 degrees for about 20 minutes, until golden browned. Cool.

Decrease oven temperature to 350 degrees
While crust bakes, combine eggs, sugar, lemon juice and zest and gently stir to blend all ingredients, do not beat.
 
Place prunes in cooled tart crusts, about 10-15 per pan,

and pour lemon custard over top. Bake at 350 degrees for about 18-22 minutes, until custard is set and lightly browned.
Sift confectioners' sugar over top and cut when cooled. Serve cool, or room temperature.

Enjoy your healthy-digestion dessert!

Tuesday, February 15, 2011

Apple Crisp

 
 My extremely sweet boyfriend bought these cute little foil baking cups shaped like hearts for me at Target (as well as a cute pair of knee socks)  so I could bake up little treats for my residents (and stylishly keep my feet warm) for Valentines' Day.

I choose to make apple crisps, one- because we had lots of apples to use,  two- because the other chef called cupcakes for the next day, and I didn't want to step on her toes, and three- I've been baking a lot of crisps at my new (other) job at a local bakery. And because I know everyone loves a fruit crisp.

I just kind of made-up the apple part, because you can do that, and used a topping recipe from an older version of the Joy of Cooking. And I remembered to take pictures all along the way with my iPhone- so they are not of great quality, and now my phone is all crusty. Totally worth it!

Apple Crisp

Ingredients:

9 apples
zest and juice of 2 small lemons
1/2 teaspoon nutmeg
2 teaspoons cinnamon
1/2 cup brown sugar

2 cups brown sugar
2 cups oats
1 cup flour
2 sticks (1 cup) butter, cold and cut into small peices
cinnamon and other warm spices, if desired

Preperation:
 Preheat your oven to 350 degrees F and ready you're baking vessel- I used individual foil heart cups, but you can do a giant one in a baking dish of some sort, or individual cermaic bowls, or whatever you like. Just grease the heck out of anything you are going to have to wash, and line a baking sheet with parchment or foil to catch the juices that bubble over and make your clean-up eaiser.
 Peel, core and slice your apples and cut into little chucks that will cook quickly and be easy to eat.
 
After you have the size you like, toss with lemon juice and zest, first cinnamon, nutmeg and the 1/2 cup brown sugar. 


Let the apples marinade in the juices while you prepare the topping.

I used my food processor, but you can easily do this by hand:
Combine the 2 cups brown sugar, oats, flour and any spices you are using, and pulse quickly in a processor to mix, but not to chop the oats smaller.

Add your little butter pieces, and pulse to combine, once it looks like a crumbly texture- stop.


Divide your apple mixture evenly amongst you little foil cups or in your prepared baking dish, dividing the juices evenly as well.


Evenly distribute the crisp topping over each serving, packing down to keep in place.


Bake in your preheated oven for about 20 minutes, or until topping looks golden brown, crispy and juices are bubbling out.

Cool before topping with whipped cream (highly recommended) and serving.

Happy Valentines' Day!!!

Saturday, February 12, 2011

Fig Cookies

When I went to my grandparent's house as a young kid, I remember them often having fig newtons and school boy cookies, and those became things I associated with my grandparents, and therefore, old people. So when I found figs this morning at work (in the dried fruit box, of course), I decided to attempt to make fig cookies, be they newtons or not

I used my nifty iPhone to google some recipes real quick, and settled on the third one that came up- a simple drop cookie, rather than the first two that looked more complicated and time consuming, though maybe more attractive and tastier (though I don't know how). I guess we'll find out next time.

The Fig Drop Cookies were extremely easy to make, and absolutely delicious! The figs fell apart during the short cooking time, and the seeds ended up dispersed throughout the cookie dough, so the amazingly soft finished product had a little fig crackle in every bite.

Fig Drop Cookies
(Original Recipe)

Ingredients:
  • 1 cup dried figs, chopped into little pieces
  • 1/2 cup water
  • 1 cup butter, at room temperature
  • 1/2 cup granulated sugar
  • 1/2 cup brown sugar
  • 1 egg
  • 1 teaspoon vanilla extract
  • 2 cups all-purpose flour
  • 2 teaspoons baking powder
  • 1 teaspoon salt

Preparation:
  1. In a small sauce pan, heat the water and figs to reconstitute and break down fruit. (Cool before adding to cookies.)
  2. Cream butter and sugars in an electric mixer's bowl with the paddle attachment. Blend in egg and vanilla.
  3. Whisk together flour, baking powder and salt in a separate bowl. Gradually add to creamed mixture until incorporated.
  4. Mix in figs.
  5. Drop by rounded tablespoons onto a prepared cookie sheet, and bake at 375 degrees F for about 10 minutes.
  6. Cool on wire racks, store in air-tight containers.
Makes about 30  1-1/2 inch cookies

Monday, February 7, 2011

Mashed Potatoes...and Gravy

In culinary school I learned the correct way to prepare pomme purée. Apparently it was such an important skill to master that they had us practice nearly every day, for weeks. It was a major component of our first exam. We had to cut the correct amount, in weight, of potatoes in even pieces, boil for the correct amount of time (in properly salted water), drain and dry before mashing. And we didn't mash them with a potato masher or stick them in a KitchenAid, we sent them through a food mill or tamis. They were smoother than baby food. Somewhere in there we'd mix them with (a measured amount of) hot cream and cold cubed butter, season and mix again, gently- so as not to form gluey potatoes, but enough so everything was evenly incorporated, and perfectly smooth, perfectly creamy, with the perfect balance of cream and butter, salt and white pepper.

I can appreciate this. It was our chef instructor's job to teach us to make everything perfect, everytime. But no one spends this much time on mashed potatoes- whatever you call them. I have worked in plenty of restaurants, and even the fancy ones rough chop their potatoes and boil the hell out of them, drain, stick in a huge electric mixing bowl, turn the motor on and add cream (usually straight from the carton) and butter.

I work with old people. They're no food critics- okay that's not entirely true. They have very strong opinions. And they will tell me exactly what they think. But they want good comfort food, like they used to make when they had kitchens, food their parents and grandparents used to make. They don't want pomme purée, perfectly creamy and seasoned. Many of them watch their sodium intake, some of them think pepper (be it white or black) is too spicy.
So I make it simpler for them. I am usually crunched for time, and I often make these on a weekly basis. I took some basic techniques and tips from the gureling weeks of preparing 
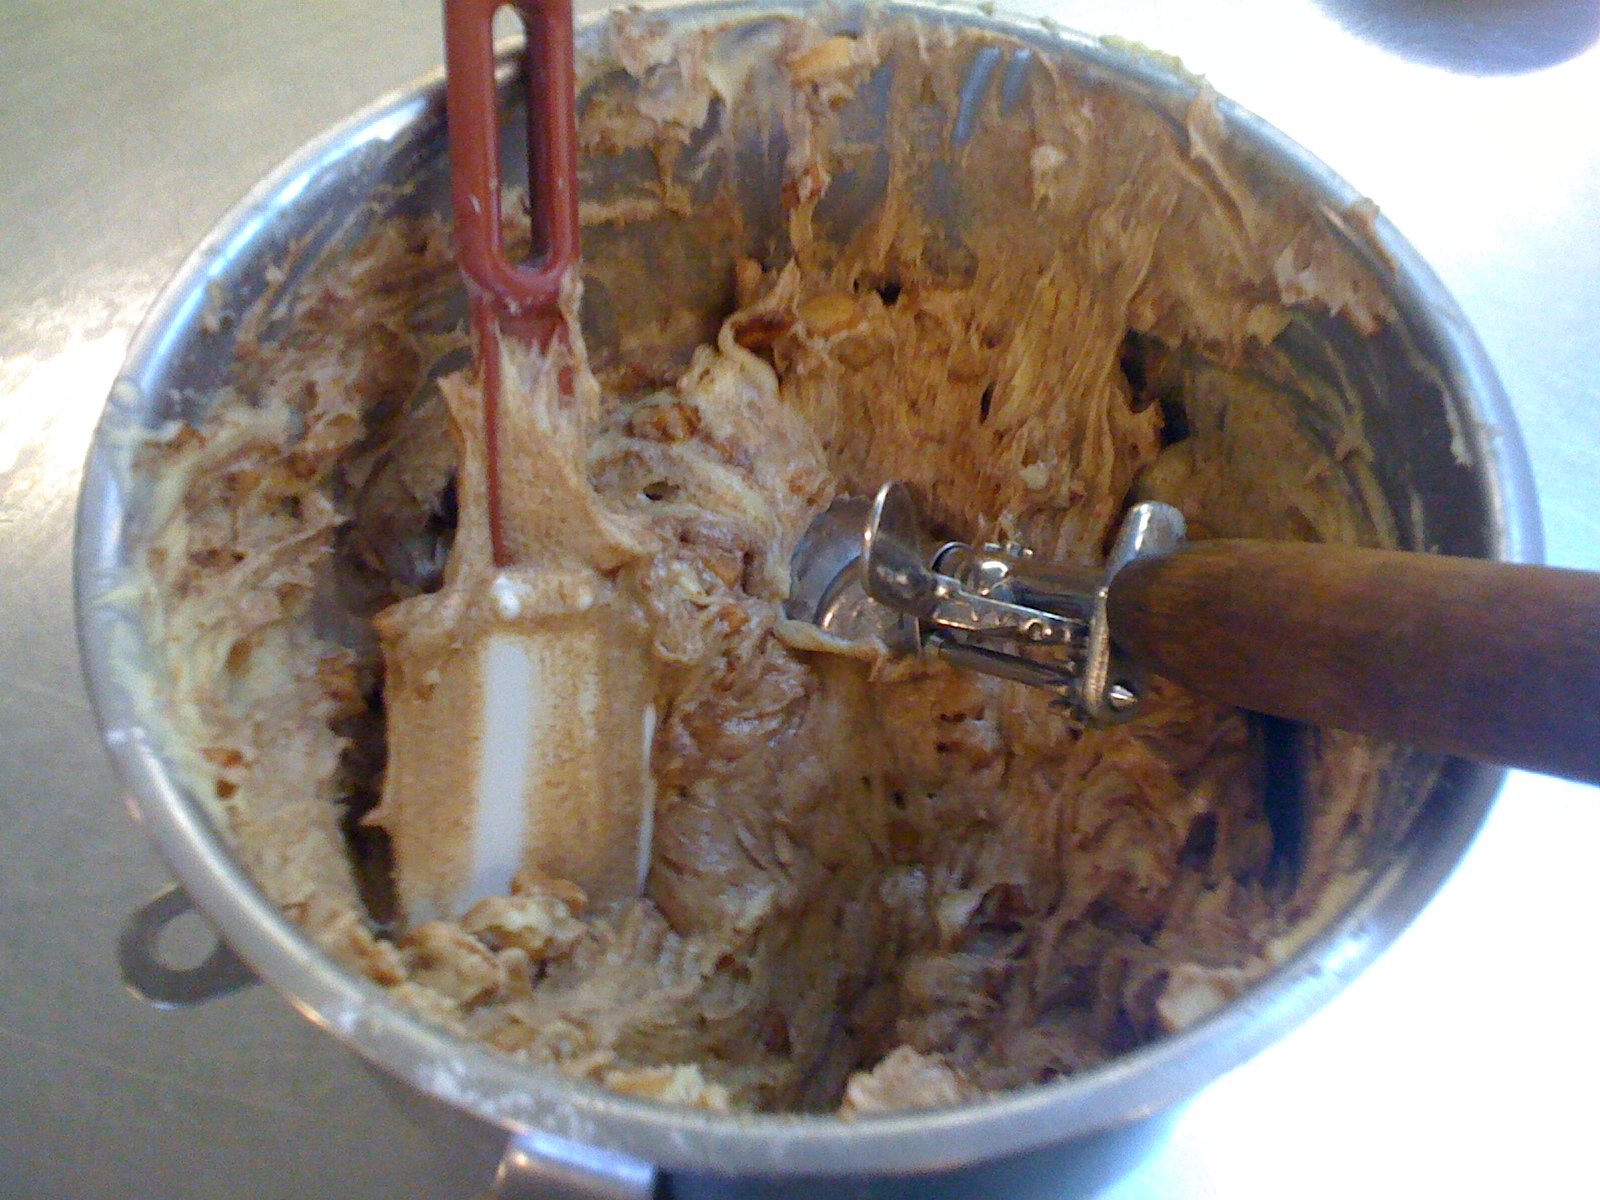
pomme purée in class, but I don't follow the teachings like the law. I peel and chop the potatoes up first thing, and as fast as I can, not worrying too much about their size. Put the cut potatoes into cold water right away so they don't oxidize and turn brown- this happens very quickly. Always start in cold water. I usually cut them straight into the pot I will be boiling them in, heavily salted, and leave it on the stove. I don't turn the heat on until about an hour before lunch service, that will give them a good 20-30 minutes to simmer away, and not have to be held hot too long. I put a pot of cream on the stove to heat up (it keeps the potatoes from cooling down), and wait. We have a KitchenAid at work, but it only has one speed: fast. I don't want hot potatoes all over the kitchen, so I use a good old fashioned hand masher (we don't have a food mill, potato ricer or tamis). I drain the soft potatoes in a colander, put them back in the empty, but still hot, pot they cooked in, and mash away. I add my butter, usually in cold cubes, then the hot cream, and some salt to taste. Occasionally I'll add roasted garlic, if I thought ahead of time and roasted some, or garlic powder- because it's easy and the old folk love it.

How ever I make it, I will get protests if it is not served accompanied with gravy. It doesn't matter what else goes on the plate- meatloaf, pan-seared chicken breasts, fish- they must have their gravy. This sometimes presents a problem. Gravy is a pan sauce made from the drippings of whatever animal you've cooked. I rarely have drippings to use. So I make the easiest cheater gravy ever. I would never admit this to my culinary classmates or instructors, but out in the field you have to find something that works. The residents love this "gravy," it's rich and thick and creamy. More of a béchemel sauce with chicken or beef flavor- actually that's exactly what it is.

I heat up some milk, usually a small pot full. I always have pre-made roux on hand (equal parts butter and flour, by weight, melted in a pot and cooked for a little bit, stirring constantly, until fragrant and nutty, and no longer tastes like raw starch). Once the milk is nice and hot, I add some roux and better than bouillon, to taste and whisk until thick and flavorful. Often I must readjust the amounts, more roux if it's not thick enough, more milk if it's too thick, more flavor, and I add crushed black pepper and freshly ground nutmeg, it give it a speckled from-scratch look.

When service comes, my residents are never disappointed by my mashed potatoes or gravy. I serve the mashers with a scoop (which I was told never to do in school, because it looks "so institutional") and press in a small ladle-full of gravy. It's the perfect amount for their small appetites, and it looks just right, considering where we are.

Sunday, February 6, 2011

Dutch Apple Cupcakes


I got the idea for these cupcakes from a local bakery. They swirl cinnamon apple chunks into a vanilla cupcake batter. I am too impatient, not to mention the time restraints at work, to individually fill each section of the muffin pan with batter, then to dollop and swirl apples into each. So I swirled a ton of apples into the whole batch, and then filled the pan. As I've mentioned before, my residents love anything with fruit, as well as especially comforting foods like apple pie, berry cobblers or these Dutch Apple Cupcakes.

I had leftover caramel sauce that I made for Caramel-Pecan Sundaes earlier that day, so for the frosting, I made a classic buttercream and incorporated about a 1/4 cup of the sauce to give it a mild caramely flavor. Then I topped with some extra bits of cinnamon apple chunks, and voila!

Dutch Apple Cupcakes

1/2 cup unsalted butter, at room temperature
2/3 cup granulated sugar
3 large eggs
1 teaspoon vanilla extract
zest of one large lemon
1 1/2 cups all-purpose flour
1 1/2 teaspoons baking powder
1/4 teaspoon salt
1/4 cup milk
Apple Swirl:
3 large apples, peeled and diced (I used Granny Smith)
2 tablespoons cinnamon
1 teaspoon nutmeg

Preheat oven to 350 degrees Fahrenheit and line 2 (12 each) muffin pans with paper liners.

Cream the butter and sugar together in an electric mixer until light and fluffy. Beat in vanilla and lemon zest.

In a separate bowl, whisk together the flour, baking power and salt.

Combine apple chunks with cinnamon and nutmeg, stir to coat all pieces evenly.

 With the mixer on low speed, alternately add the flour mixture and milk, in three additions, beginning and 
ending with the flour. Scrape down the sides of the bowl as needed.

Swirl in most of the apples, reserving about a 1/2 cup for garnish.
 Scoop into prepared muffin pan and bake for about 18-20 minutes, or until set and toothpick inserted into center comes out clean.
 Cool completely, then frost with buttercream (caramel optional) or other favorite frosting, and garnish with apple pieces. 


Makes 18-24 cupcakes.


Caramel Pecan Sundaes

You scream I scream.

My residents love ice cream. Almost daily, someone will order ice cream as an alternative to the featured dessert. When ice cream is the headliner, I don't get any complaints. It's cold, it's smooth, it's creamy, it's easy to eat, it's easy to serve, what's not to love about ice cream? If we had an ice cream maker at work, I would make it myself, and perhaps someday we will get one, but for now, store bought is just fine.

We all scream for ice cream!

I got this caramel sauce recipe from culinary school- I have made it countless times, and it has never failed me. Once you get the hang of it, you won't need to measure, just wing it. It's extremely versatile- you can make it as dark (bitter) or light (sweet) as you want, and incorporate additions, such as beer or rum. And it keeps for weeks (refrigerated) so you can always have it on hand!

Caramel Sauce
yield: 2 1/2 cups

ingredients:
8 ounces sugar
3 ounces water
8 ounces heavy cream, hot
pinch salt ( I like my caramel salty, so I add more to taste )
1-2 tablespoons butter

directions:
Place the water, then sugar, into a (medium or large) saucepan, cover a heat over medium until the sugar syrup goes clear. Do not stir! Resist the urge! Once all the sugar is dissolved, remove lid, raise the heat to high, and boil off the water as quickly as possible. Cook to a medium dark caramel, lowering or turning off the heat towards the end to prevent burning. Remove from heat and slowly add the hot cream and salt to caramel, stirring to prevent boiling over. Stir until the sauce is a uniform consistency. Stir in butter. Store refrigerated in a covered container (I use a squirt bottle).

Candied Nuts
yield: about 3 cups

ingredients:
3 cups pecan halves or other nuts
1 large egg white, lightly beaten
1/2 cup sugar, brown sugar, honey or maple syrup
1 teaspoon spices- cinnamon and nutmeg or other combination

directions:
Preheat oven to 300 degrees Farenheit. Toss nuts with egg whites in a large bowl. Srpinkle with spices and toss to coat thoroughly. Spread onto a sheetpan and bake, stirring occasionally to ensure even baking, for about 30 minutes. Cool and store airtight for up to 2 weeks.

Caramel Pecan Sundaes-
If you have any caramel sauce and nuts leftover, not to mention ice cream, you can make your old folks (and yourself) a caramel pecan ice cream sundae: Just put them together. Whipped cream optional.


three simple components: vanilla ice cream with homemade caramel sauce and candied pecans

Tuesday, February 1, 2011

Date Topped Brownies

Now, this making two daily desserts business is not an easy feat. I have to be creative and try new ideas (that don't always work) and keep coming up with new ones. I don't like to do the same dessert twice, even if they love it. I will eventually, but I don't want to get stuck in a rut where I keep baking the same things from my little stockpile of pastries. So I am building a binder, my pastry arts binder, meticulously organized, of all desserts I have tried and that were successes. There are recipes from culinary school, from my grandma, things I've tried at home, and every recipe that has won a victory at work. So onto to the successful experiment of date brownies- who just made it into my binder.
I found dates at work in the dried fruit box. I had already used the dried cranberries, raisins, cherries... So I tasted a date. I'm not sure if I had ever had one before, but this blew my mind. It was a heavenly shriveled up lump of sweetness, and I had to use it.

I usually would use my little iPhone screen to look up recipes, but I didn't have time. It was already 7:00 AM, and the menu goes out by 7:30- and I had breakfast items to prepare. I quickly searched around, saw the cocoa powder, remembered there was some left-over chocolate frosting I was suppose to use, and decided on brownies. At that point I had not decided whether I was going to put them inside or just on top- but I had something to put on the menu.

I would have called these "date brownies," but then the assumption might have been that they are a healthier brownie version- made with "date sugar," and they are not. I'm sure that would be great though, and there are many diabetics amongst the elderly, so I will try (someday) and get back to you with that recipe as well.

Date Topped Brownies

brownies:
1/2 cup vegetable oil
1 cup sugar
1 teaspoon vanilla extract
2 eggs
1/2 cup flour
1/3 cup cocoa powder
1/4 teaspoon baking powder
1/4 teaspoon salt
(1/2 cups chopped dates)
frosting:
2 3/4 cups confectioners' sugar
6 tablespoons cocoa powder
6 tablespoons butter, at room temperature
5 tablespoons evaporated milk
1 teaspoon vanilla extract
Dates for topping (1 per brownie)

Preheat oven to 350 degrees Fahrenheit.
Grease a 9x9 inch baking pan.
Mix together oil, sugar and vanilla, then beat in the eggs.
Combine flour, cocoa powder, baking powder and salt, then stir into sugar mixture.
Stir in chopped dates, if using.
Spread into prepared pan, and bake 20-25 minutes.

Meanwhile, prepare the frosting:
Mix together the cocoa powder and confectioners' sugar.
Cream the butter with an electric mixer until smooth, then gradually add sugar mixture alternately with evaporated milk.
Add vanilla, then beat until light and fluffy. Consistency may be adjusted with more milk or sugar.

When brownies are cooled, cut into squares, frost and top each with a whole date.

Enjoy with your favorite seniors!

Chicken Lemon Rice Soup

My mother always made this when someone in our family was sick. When I first moved out, I didn't live too far away, so everytime I got sick, I'd just go stay with her and she'd make it for me. It wasn't until recently that my boyfriend and I moved halfway across the country, and when one of us got sick, and I finally asked for her recipe.

It's soup, not an exact recipe (more like guidelines). So you can add more of this and less of that if you want. And play with it. I use leftovers sometimes, when I have rice I need to use, or chicken carcasses, I'll make home made stock, which is so much richer, but when someone gets sick, and I don't have anything to use, I'll make it from scratch. It's become a favorite at home, as well as with the elderly (who are often sick). It's a feel-better soup.

Chicken Lemon Rice Soup

2 chicken breasts, cut into bite-sized cubes
vegetable oil or butter
1 small yellow onion, small diced
6 cups chicken broth
3 tablespoons lemon juice
1 cup rice (uncooked)
1 medium carrot, shredded (or small diced)
salt and pepper
dried parsley

Season and cook chicken pieces until done, set aside.
Sweat the onions, until translucent, in a small amount of vegetable oil or butter and salt. (If dicing the carrot, add now).
Add stock and lemon juice and bring to a simmer.
Add rice, and simmer until rice is cooked through, about 20 minutes.
Add shredded carrots, chicken and dried parsley.
Season to taste.