Monday, April 18, 2011

Sugar Free Trials

Yesterday was my last day at the assisted living facility I've been working at, but not the end of cooking for seniors. I am keeping my job at the bakery instead, not only because I prefer it, but because it will better prepare me for a future as a pastry chef in a very upscale and snazzy old folks home. We specialize in gluten-free and vegan desserts, as well as the tasty originals, techniques I did not learn in culinary school, and things that will prove to be very valuable in my specialized industry.

But the biggest thing is sugar free baking, something I am just starting to explore, both in the bakery and at home.

Last night, after my last day, I started a new first. My first experimental recipe using xylitol instead of sugar. My boss, and bakery owner, is excited to also start experimenting with xylitol, and since I am the head (and only) baker, I get to do all the recipe development.

My first trial, using things I had on hand (since I didn't want to run out the the grocery store, again), ended up being a loaf of banana bread/cake. I adapted it from a recipe in the only known xylitol cookbook, Sweeten Your Life the Xylitol Way by Karen Edwards (available on amazon), for Banana Cake, baked it late last night, and tried the first slice this morning for breakfast. Not too bad for my first try! And it is definitely sweet.

I will share all my trial sugar free recipes, whether they use xylitol, stevia or no substitute. I doubt I will be experimenting with the harsher chemical sugar substitutes such as aspartame (Equal and NutraSweet), and try to stick with a natural approach.

Xylitol can be substituted for sugar, 1:1. It will not caramelize or feed yeast, but is otherwise a very useful and easy alternate. I have read that xylitol is very deadly to dogs, more so than chocolate, so be very careful to keep your stash and xylitol baked goods away from your K-9 pals!

Banana Loaf Cake
adapted from Sweeten Your Life the Xylitol Way by Karen Edwards

2/3 cup whole wheat flour
1/2 teaspoon baking soda
pinch of salt
1 tablespoon + 1 teaspoon butter, melted
1/2 cup mashed ripe banana (about one medium-large banana)
2 tablespoons + 2 teaspoons plain yogurt
1/2 teaspoon vanilla extract
1 egg, seperated
1/2 cup xylitol
  1. Combine flour, baking soda and salt in a bowl and set aside.
  2. In another bowl, mix together the melted butter, mashed banana, yogurt, vanilla and egg yolk.
  3. In a large bowl, beat the egg white with electric mixer until soft peaks form, then add the xylitol and beat until peaks are stiff but not dry.
  4. Gradually fold dry ingredients into beaten egg whites alternately with banana mixture, and stir just until batter is smooth.
  5. Pour into and spread evenly in a greased 8" x 4" loaf pan, and bake at 350 degrees F for 15-20 minutes, until a toothpick inserted in center comes out clean. Cool completely. 
  6. Store at room temperature in an airtight container.

Sunday, April 10, 2011

Chocolate Strawberries (and cream)

I've mentioned before how fruit is always a big hit, be in canned or fresh or frozen, made into a sauce, a dessert, atop a salad, or standing alone. We always have tons on hand, in every form, from frozen berries, fresh melons, pineapples, strawberries, grapes and citrus fruits, to a dried assortment and canned cranberries and mandarin orange segments.

I try to incorporate fruit into my desserts and salads as much as possible, and always serve fresh oranges and grapefruit with breakfast. I tend to do the same thing over and over again: spinach salad with halved grapes, sliced strawberries, feta cheese, candied pecans and balsamic vinaigrette. Strawberry shortcake (an all-time favorite), berry crisp, black-bottomed banana cake, lemon bars...

But yesterday we had these gorgeous strawberries, bright red, perfect size, shape, sweet and juicy- I wanted to showcase their beauty and flavor, without serving them naked and alone. I decided to serve them dipped or drizzled with chocolate with some fresh soft whipped cream. So simple, so easy, and I've never gotten so many compliments on a dessert.

When the residents saw "chocolate strawberries" on the menu, a lot of them asked what that meant, or asked "chocolate strawberry what?" Chocolate strawberry nothing. Many noted how beautiful they looked, and all commented on how wonderful they tasted. One resident told me she had heard of covering strawberries with chocolate, but never actually had it- I was shocked to hear that someone had not tried these before, but then I heard it several more times. Even my pickiest resident, who is always telling me how awful food my food was (even when she's the only one that thinks so) went out of her way to tell me the afternoon dessert was lovely. That it was such a simple idea, and yet no one had ever served it before.

So if for some reason, the seniors in your life have not tried chocolate dipped strawberries, please do something about it immediately. Spring is here, berries are starting to pop up (not that you can't get anything, anytime these days), and fresh strawberries covered in chocolate and served with a cool fresh whipped cream, slightly sweetened with sugar and vanilla are a wonderful light (but rich) and elegant dessert.

In case you're not sure how, here are the basics:
Fresh strawberries, washed and dried
Chocolate for melting (such as chocolate chips)
Whipping Cream
Powdered sugar (about 1/2 cup per 2 cups cream)
Vanilla (about 1 teaspoon per 2 cups cream)

Melt your chocolate over a double boiler, you might want to add a little cream for smoothness. Dip your clean dry strawberries in the chocolate, roll around or use a spoon to coat all the way up the the green stem. Place on a baking sheet covered with wax or parchment paper to set. Once all are coated, put in fridge. Whip your cream, sugar and vanilla to very soft peaks. Serve together!

(I often sprinkle the still wet chocolate strawberries with finishing salt, or drizzle with stripes of melted white chocolate for garnish)

Monday, April 4, 2011

Scholarship Essay

I recently applied for a partial scholarship to Johnson & Wales University. They offer an amazing culinary nutrition program that would help me move forward in the senior food industry I have found myself. I'm trying not to get my hopes up, I'm not sure that I could afford to go back to school right now anyways, and I have no idea when I'm due to hear back from them.

The program is a four-year bachelor's degree,  the first two years being a culinary education and the second two would be the culinary nutrition part, with classes such as Vegetarian Cuisine, Designing Healthy Desserts, Life Span Nutrition and other great courses.

Since I've already attained my culinary degree, I would get to go directly into the second two years of the program, and probably have many of the science and math classes waved because of my previous college coursework.

Even if I don't get this particular scholarship, I would love to go back to school and get this, or a similar, degree. Going back this fall, a mere five months from now, might not be realistic, but this kind of education would be a great asset to have along side of my culinary education and experience.

I hope I am contacted soon, with the good or bad news! You will hear more...

And now, the essay:


"one-page, typed essay about applicant’s inspiration and passion for food and cooking, goals for the future, and how being awarded this scholarship could help achieve those goals"

I grew up in a home strongly influenced by my pastry chef mother and her out-of-home catering business. I have worked, unofficially, in the food industry since I was 9 years old. At 16, I landed my first “real” job in the industry, and haven't looked back.

After high school, I paused my culinary career to pursue a degree in the field of science at Western Washington University. However, my weekend job cooking at an assisted living facility, and my after school dinner parties, consistently pointed me back to the culinary industry. I enjoyed my studies in chemistry and biology but my passion was cooking. After approximately two years at Western, the Culinary School of the Rockies’ Farm-to-Table program brought me to Boulder, Colorado, where the farm to table movement dominates the restaurant scene.

Working in the kitchen at assisted living facilities and serving the senior parts of our society during the last five years has been a most rewarding experience. I am passionate about creating and serving healthy, nutritious yet delicious foods to seniors, who are some of our more vulnerable members of society. This population will see significant growth in the years to come, as the “Boomers” enter their retirement years and demand higher standards in food service.

My commitment to changing the way we eat extends to the next generation as I recently have been volunteering in the Boulder Valley School District, where I help fight to get healthy and local foods into the cafeteria, and at home. I volunteer in cooking classes to teach the students how to prepare wholesome meals, as well as in lunch-hour tastings to encourage them to try foods that may be unfamiliar. I believe strongly that we must change the diets of our youth to see any lasting changes in our society.

Looking forward, I see myself leading large organizations within the senior care industry or the school system, where I can help shape and lead the changes I am passionate about in the senior and junior members of our population. I have been lucky to have had strong role models to have shaped my self confidence in leadership within this specialized culinary niche. I could not speak more highly of any than my mother who shaped my commitment to integrity, work ethic and the knowledge that I can do whatever I set my mind to.

This scholarship will allow me to finish my bachelors degree uniting my two favorite subjects, cooking and science. The Johnson & Wales Culinary Nutrition degree is what I've been searching for; it will allow me to combine my love of cooking and my desire to adapt recipes to individual nutritional needs and to create healthy foods for all.

This culinary nutrition degree would help me achieve a position in which I would have greater ability to make changes in the way our society, old and young, eat, prepare and think about food. The program will help me gain the additional knowledge, skill set and confidence required to plan and execute preparation of well-crafted foods with unique dietary and nutritional requirements in mind.

Your enabling of my educational objectives will be an investment in our existing and future generations.  Thank you for this great opportunity.

Sincerely.

Sydney Davidson

Sunday, April 3, 2011

Cheesecake Parfait

It's been a while since I've posted, and I'm starting to realize how blogging is much less formal than I originally thought. I've neglected to update since I've taken bad pictures, been too sleepy (or tipsy), had little time, and few new ideas. Oh, and that I got a new doggie! That's really when my posts ceased. But from now, I will treat this as my food diary (specific to my job/passion as a cook for the elderly) and go with the flow.

I love the Food Network Magazine, it is by far the most fun and light-hearted of the cooking magazines- no stuffy pretensions of what cooking should be and how culinarians should act. It feels very true to the reason I love everything food: it's fun, exciting and makes people happy. 

I was skeptical of the cookbook they are now publishing, based on easy and quick weeknight meals. I have nothing against quick cooking, it's the desserts that peeved me. In the latest edition (April 2011), they feature 23 10-minute desserts, which on it's own is fine, I love a quick-fix sweet treat, but most of these kinda suck.

A ten minute chocolate glazed pound cake = store bought pound cake + melted chocolate. Or, sandwich ice cream between cooled toasted frozen waffels for an ice cream wafflewich. Things that are not by any means bad ideas, and actually great tricks, but nothing that deserves to be circulated in a culinary publication.

There were a few jems in the magazine section, and hopefully more to come in the cookbook (because I will buy it), including a simple microwave fudge recipe, a grapefruit brûlée and the idea of combining ricotta cheese, balsamic reduction and fresh berries for a dessert.

My favorite: Cheesecake Parfaits. Almost every [non-pastry chef] friend of mine is intimated by cheesecakes. For some reason most people think they are incredibly difficult. Maybe it's the waterbath or the excessively long cooking time at a low temperature, or the "fancy" spring-form pan needed to bake the cake,  I'm not sure, but most people I know won't bother to try it. I hope the cheesecake parfait changes their minds. It tastes as great as a cheesecake, perhaps better, and takes a mere 10 minutes to prep.

I know my seniors like cheesecake, but it is a difficult thing to fit into my day, if only because of the cooking and cooling time they require. I have never made a cheesecake at my current home- I'd gotten away with cheesecake brownies, and decided to leave the actual cakes up to the other cook and the grocery store.

Thank you Food Network Magazine for the idea of cheesecake parfaits! Basically you layer graham cracker crumbs in the bottom of a glass, top with a "cheesecake" cream layer and fresh fruit, and voila! Fantastically easy and delicious.

This is my variation of the recipe I found in the Food Network Magazine, soon to be published in their first cookbook. (Click here for original recipe.)


Cheesecake Parfaits
yield enough for 25 seniors

Pulse graham crackers in food processor until fine crumbs are formed. Put a heaping tablespoon of crumbs in each of 25 small glasses.

Beat 24 ounces softened cream cheese (3 packages) with 9 tablespoons sugar, 9 tablespoons heavy cream, and 1 teaspoon vanilla extract, and 5 diced large strawberries (or other fresh fruit, optional). Pour equal amounts in each glass.

Top with fresh fruit (I used strawberries) and whipped cream.  --I ended up topping with whipped cream first, then sliced berries.

I believe this is slightly healthier than real cheesecake, no eggs or sour cream, no butter... Could even be made with milk instead of cream and reduced fat cream cheese. But I made it the delicious way, because my audience won't be around that much longer anyways.

Saturday, March 5, 2011

Peanut Butter Chocolate Banana Cake

Is there a better combination than banana, chocolate and peanut butter?
I've been craving peanut butter and bananas recently, and I've settled for just smearing fresh bananas with the creamy goodness. But my new job at the bakery has left me wanting to make cake all the time, surprisingly enough. So when I got to work this morning and saw all the bananas, I decided on Banana Cake with Peanut Butter Frosting.

I went to open the fridge and saw a batch of chocolate frosting I had made the previous weekend, and was initially bummed I hadn't yet thought of a way to use it.

While the residents were going over the menu, one mentioned that peanut butter in frosting did not sound good. I told her that I had some extra chocolate and I could frost her piece with that instead, but that peanut butter and bananas are delicious together. She said that was true, and that she'd give it a try.

Once again, my chocolate frosting goes unused. I leave it out at room temperature, just in case.

It was not until the cakes are out of the oven and my peanut butter icing is made that I decide to use the chocolate. I used it as the filling between the two layers of cake, then frosted the outside with the peanut butter, and garnished with chocolate chips to tie it all together.

Yummmmm!

Banana Cake
makes 4 8'' cake rounds, or 2 finished cakes

ingredients:
1/2 cup butter
1/2 vegetable oil
1 cup water
2 1/4 cup flour
2 cups sugar
1 teaspoon salt
2 eggs
1 teaspoon vanilla
1/3 plain yogurt
1 1/2 teaspoons apple cider vinegar
1/2 cup whole milk (minus 1 1/2 teaspoons- I put the apple cider vinegar in the measuring cup, then fill it up to the 1/2 cup mark with milk)
3 large bananas, pureed in a blender

preparation:

Preheat oven to 350 degrees F. Line 4 8-inch round cake pans with parchment paper and spray lightly with cooking spray.

If you haven't already, combine apple cider vinegar, vanilla and milk together to curdle.

Melt butter in small saucepan with oil and water.

Sift and combine flour, sugar, salt and baking soda in the bowl on an electric stand mixer fitted with the paddle attachment. Turn on low speed to mix.
Slowly pour melted fat mixture into bowl with paddle running at low speed. Scrape bowl and paddle, mix again briefly.

Combine the curdled milk mixture with the eggs and yogurt, and pour into mixer, running at low speed.
Scrap down sides of bowl, add banana and mix again, just to combine thoroughly. (Do not over-mix- this will form gluten and make your cake tough.)

Divide evenly amongst your 4 pans, place in pre-heated oven and bake for about 20-25 minutes, until a toothpick inserted near middle comes out clean.

When cool, un-mold and place one round on a plate, slather with chocolate frosting and stack on the next layer. Frost the entire cake with peanut butter frosting, decorate as you wish. Repeat with second cake.

 Frostings

I didn't follow a recipe or write one down for the frosting. They are easy to make up as you go.

For peanut butter, I used equal parts butter and peanut butter (about 1 cup each), and mixed until smooth, then added a teaspoon of vanilla, and powdered sugar until the desired consistency and flavor was reached.

For chocolate- same thing, just no peanut butter, add about 1/2 cocoa powder, and a few teaspoons of milk


Wednesday, March 2, 2011

Portion Size

The thing that shocked me the most when I first began working with the elderly was the portion size of their meals. Maybe it's because I belong to the super-size-me generation, that portion sizes really were that tiny 60 years ago, or maybe when you get old you just eat less. I suppose the baby boomers and the next aging generations will tell us more, but I suspect it is a combination.
 
The elderly folks (that I work with) don't do much, so their caloric needs are much less than that of an active adult. They get up, they shower, they use their walkers to shuffle to the dining room for breakfast, then to the TV room until lunch, then back to the TV until dinner, maybe a game of scrabble, then to bed. A day in the life of a senior at XYZ assisted living revolves around meal time.

Everything is smaller: appetites, plates, bowls, bagels
The entree plates we use at the old folk's home are not a common size. They are in between the sizes of a small hors d'ourve plate and the (present) standard dinner plate. Paper plate size. The perfect size to make a little portion still fill it up and look like an adequate meal, which it is.

Old people can be very particular. The current ones came from an age where food was not in abundance, where they ate everything on their plates, when they couldn't get any ingredient on the planet like we can today.  Many of them get very overwhelmed by the amount of food I sometimes load onto their plates, so overwhelmed that instead of working away it it and eating what they can, they don't touch it. So my ignorance to their preferred portion size results in their skipping of a meal. Respect their portion control. Use a small plate, give them one scrambled egg for breakfast, half a sandwich for lunch, I know it doesn't seem like much, but it's enough.

I've got a list of my "big eaters" and my "small eaters". The big eaters get a whole sandwich for dinner! The smaller or half-portion eaters get, well, a half sandwich. Even the so-called big or "good" eaters eat much less than your average American these days. It becomes very apparent when I feed the staff- their plates are often 1.5 to 2 times larger than the "good eaters." I'm not saying that all non-seniors eat too much, we are much more active in our youth and have higher metabolisms (especially in Boulder, Colorado), and require more calories.

Their little appetites are another reason seniors should be fed nutritious foods; they are only going to eat so much, so there is a much smaller opportunity for them to get all their required nutrients. It is recommended that seniors take a multivitamin, and most do, in addition to their other numerous pills and medications.
...but that's a topic for another day.

The one thing most of my seniors don't skimp on is dessert. I send out the daily menu and receive half orders for the entree, salad and soup, and double orders of dessert! But I like to believe it's because they love my baking.

Friday, February 25, 2011

Lemon Prune Tart


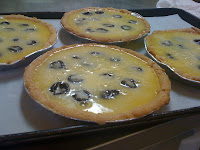
I was in search of a delicious dessert using prunes- because old folks eat them all the time, and we always have tons in the dried fruit box. I came across a recipe for a lemon prune tart- sounded yummy, so I put it on the menu. When the time came to put it together, I realized how odd the recipe was, that I didn't have the time or the resources to make it, and so I came up with my own.

I used the custard from the "Fresh Lemon Bar" recipe in Cookies at the Academy (only the best cookie cookbook ever!), with a different crust, adapted it into pie form and added prunes. It turned out really good, and because it's such a good lemon bar recipe, you could make it with or without the prunes, or use another fruit instead.

Lemon Prune Tart
Makes 4 pies

Crust:
4 1/2 cups flour
2 cups powdered sugar
2 1/4 cups butter

Custard:
16 eggs
8 cups granulated sugar
1 1/2 cups lemon juice
zest of 4 lemons
dried prunes

confectioners' sugar for topping pies

Preheat oven to 375 degrees F.

Combine ingredients for crust in an electric mixer bowl and mix until a soft dough forms. Divide evenly between pie pans and press onto bottom and sides. Bake at 370 degrees for about 20 minutes, until golden browned. Cool.

Decrease oven temperature to 350 degrees
While crust bakes, combine eggs, sugar, lemon juice and zest and gently stir to blend all ingredients, do not beat.
 
Place prunes in cooled tart crusts, about 10-15 per pan,

and pour lemon custard over top. Bake at 350 degrees for about 18-22 minutes, until custard is set and lightly browned.
Sift confectioners' sugar over top and cut when cooled. Serve cool, or room temperature.

Enjoy your healthy-digestion dessert!

Tuesday, February 15, 2011

Apple Crisp

 
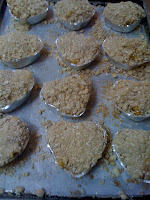
 My extremely sweet boyfriend bought these cute little foil baking cups shaped like hearts for me at Target (as well as a cute pair of knee socks)  so I could bake up little treats for my residents (and stylishly keep my feet warm) for Valentines' Day.

I choose to make apple crisps, one- because we had lots of apples to use,  two- because the other chef called cupcakes for the next day, and I didn't want to step on her toes, and three- I've been baking a lot of crisps at my new (other) job at a local bakery. And because I know everyone loves a fruit crisp.

I just kind of made-up the apple part, because you can do that, and used a topping recipe from an older version of the Joy of Cooking. And I remembered to take pictures all along the way with my iPhone- so they are not of great quality, and now my phone is all crusty. Totally worth it!

Apple Crisp

Ingredients:

9 apples
zest and juice of 2 small lemons
1/2 teaspoon nutmeg
2 teaspoons cinnamon
1/2 cup brown sugar

2 cups brown sugar
2 cups oats
1 cup flour
2 sticks (1 cup) butter, cold and cut into small peices
cinnamon and other warm spices, if desired

Preperation:
 Preheat your oven to 350 degrees F and ready you're baking vessel- I used individual foil heart cups, but you can do a giant one in a baking dish of some sort, or individual cermaic bowls, or whatever you like. Just grease the heck out of anything you are going to have to wash, and line a baking sheet with parchment or foil to catch the juices that bubble over and make your clean-up eaiser.
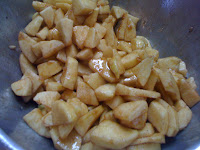
 Peel, core and slice your apples and cut into little chucks that will cook quickly and be easy to eat.
 
After you have the size you like, toss with lemon juice and zest, first cinnamon, nutmeg and the 1/2 cup brown sugar. 


Let the apples marinade in the juices while you prepare the topping.

I used my food processor, but you can easily do this by hand:
Combine the 2 cups brown sugar, oats, flour and any spices you are using, and pulse quickly in a processor to mix, but not to chop the oats smaller.

Add your little butter pieces, and pulse to combine, once it looks like a crumbly texture- stop.


Divide your apple mixture evenly amongst you little foil cups or in your prepared baking dish, dividing the juices evenly as well.


Evenly distribute the crisp topping over each serving, packing down to keep in place.


Bake in your preheated oven for about 20 minutes, or until topping looks golden brown, crispy and juices are bubbling out.

Cool before topping with whipped cream (highly recommended) and serving.

Happy Valentines' Day!!!

Saturday, February 12, 2011

Fig Cookies

When I went to my grandparent's house as a young kid, I remember them often having fig newtons and school boy cookies, and those became things I associated with my grandparents, and therefore, old people. So when I found figs this morning at work (in the dried fruit box, of course), I decided to attempt to make fig cookies, be they newtons or not

I used my nifty iPhone to google some recipes real quick, and settled on the third one that came up- a simple drop cookie, rather than the first two that looked more complicated and time consuming, though maybe more attractive and tastier (though I don't know how). I guess we'll find out next time.

The Fig Drop Cookies were extremely easy to make, and absolutely delicious! The figs fell apart during the short cooking time, and the seeds ended up dispersed throughout the cookie dough, so the amazingly soft finished product had a little fig crackle in every bite.

Fig Drop Cookies
(Original Recipe)

Ingredients:
  • 1 cup dried figs, chopped into little pieces
  • 1/2 cup water
  • 1 cup butter, at room temperature
  • 1/2 cup granulated sugar
  • 1/2 cup brown sugar
  • 1 egg
  • 1 teaspoon vanilla extract
  • 2 cups all-purpose flour
  • 2 teaspoons baking powder
  • 1 teaspoon salt

Preparation:
  1. In a small sauce pan, heat the water and figs to reconstitute and break down fruit. (Cool before adding to cookies.)
  2. Cream butter and sugars in an electric mixer's bowl with the paddle attachment. Blend in egg and vanilla.
  3. Whisk together flour, baking powder and salt in a separate bowl. Gradually add to creamed mixture until incorporated.
  4. Mix in figs.
  5. Drop by rounded tablespoons onto a prepared cookie sheet, and bake at 375 degrees F for about 10 minutes.
  6. Cool on wire racks, store in air-tight containers.
Makes about 30  1-1/2 inch cookies

Monday, February 7, 2011

Mashed Potatoes...and Gravy

In culinary school I learned the correct way to prepare pomme purée. Apparently it was such an important skill to master that they had us practice nearly every day, for weeks. It was a major component of our first exam. We had to cut the correct amount, in weight, of potatoes in even pieces, boil for the correct amount of time (in properly salted water), drain and dry before mashing. And we didn't mash them with a potato masher or stick them in a KitchenAid, we sent them through a food mill or tamis. They were smoother than baby food. Somewhere in there we'd mix them with (a measured amount of) hot cream and cold cubed butter, season and mix again, gently- so as not to form gluey potatoes, but enough so everything was evenly incorporated, and perfectly smooth, perfectly creamy, with the perfect balance of cream and butter, salt and white pepper.

I can appreciate this. It was our chef instructor's job to teach us to make everything perfect, everytime. But no one spends this much time on mashed potatoes- whatever you call them. I have worked in plenty of restaurants, and even the fancy ones rough chop their potatoes and boil the hell out of them, drain, stick in a huge electric mixing bowl, turn the motor on and add cream (usually straight from the carton) and butter.

I work with old people. They're no food critics- okay that's not entirely true. They have very strong opinions. And they will tell me exactly what they think. But they want good comfort food, like they used to make when they had kitchens, food their parents and grandparents used to make. They don't want pomme purée, perfectly creamy and seasoned. Many of them watch their sodium intake, some of them think pepper (be it white or black) is too spicy.
So I make it simpler for them. I am usually crunched for time, and I often make these on a weekly basis. I took some basic techniques and tips from the gureling weeks of preparing pomme purée in class, but I don't follow the teachings like the law. I peel and chop the potatoes up first thing, and as fast as I can, not worrying too much about their size. Put the cut potatoes into cold water right away so they don't oxidize and turn brown- this happens very quickly. Always start in cold water. I usually cut them straight into the pot I will be boiling them in, heavily salted, and leave it on the stove. I don't turn the heat on until about an hour before lunch service, that will give them a good 20-30 minutes to simmer away, and not have to be held hot too long. I put a pot of cream on the stove to heat up (it keeps the potatoes from cooling down), and wait. We have a KitchenAid at work, but it only has one speed: fast. I don't want hot potatoes all over the kitchen, so I use a good old fashioned hand masher (we don't have a food mill, potato ricer or tamis). I drain the soft potatoes in a colander, put them back in the empty, but still hot, pot they cooked in, and mash away. I add my butter, usually in cold cubes, then the hot cream, and some salt to taste. Occasionally I'll add roasted garlic, if I thought ahead of time and roasted some, or garlic powder- because it's easy and the old folk love it.

How ever I make it, I will get protests if it is not served accompanied with gravy. It doesn't matter what else goes on the plate- meatloaf, pan-seared chicken breasts, fish- they must have their gravy. This sometimes presents a problem. Gravy is a pan sauce made from the drippings of whatever animal you've cooked. I rarely have drippings to use. So I make the easiest cheater gravy ever. I would never admit this to my culinary classmates or instructors, but out in the field you have to find something that works. The residents love this "gravy," it's rich and thick and creamy. More of a béchemel sauce with chicken or beef flavor- actually that's exactly what it is.

I heat up some milk, usually a small pot full. I always have pre-made roux on hand (equal parts butter and flour, by weight, melted in a pot and cooked for a little bit, stirring constantly, until fragrant and nutty, and no longer tastes like raw starch). Once the milk is nice and hot, I add some roux and better than bouillon, to taste and whisk until thick and flavorful. Often I must readjust the amounts, more roux if it's not thick enough, more milk if it's too thick, more flavor, and I add crushed black pepper and freshly ground nutmeg, it give it a speckled from-scratch look.

When service comes, my residents are never disappointed by my mashed potatoes or gravy. I serve the mashers with a scoop (which I was told never to do in school, because it looks "so institutional") and press in a small ladle-full of gravy. It's the perfect amount for their small appetites, and it looks just right, considering where we are.

Sunday, February 6, 2011

Dutch Apple Cupcakes


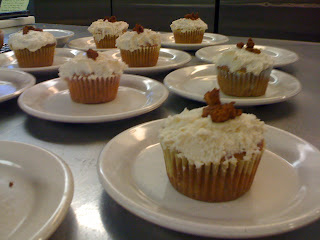
I got the idea for these cupcakes from a local bakery. They swirl cinnamon apple chunks into a vanilla cupcake batter. I am too impatient, not to mention the time restraints at work, to individually fill each section of the muffin pan with batter, then to dollop and swirl apples into each. So I swirled a ton of apples into the whole batch, and then filled the pan. As I've mentioned before, my residents love anything with fruit, as well as especially comforting foods like apple pie, berry cobblers or these Dutch Apple Cupcakes.

I had leftover caramel sauce that I made for Caramel-Pecan Sundaes earlier that day, so for the frosting, I made a classic buttercream and incorporated about a 1/4 cup of the sauce to give it a mild caramely flavor. Then I topped with some extra bits of cinnamon apple chunks, and voila!

Dutch Apple Cupcakes

1/2 cup unsalted butter, at room temperature
2/3 cup granulated sugar
3 large eggs
1 teaspoon vanilla extract
zest of one large lemon
1 1/2 cups all-purpose flour
1 1/2 teaspoons baking powder
1/4 teaspoon salt
1/4 cup milk
Apple Swirl:
3 large apples, peeled and diced (I used Granny Smith)
2 tablespoons cinnamon
1 teaspoon nutmeg

Preheat oven to 350 degrees Fahrenheit and line 2 (12 each) muffin pans with paper liners.

Cream the butter and sugar together in an electric mixer until light and fluffy. Beat in vanilla and lemon zest.

In a separate bowl, whisk together the flour, baking power and salt.

Combine apple chunks with cinnamon and nutmeg, stir to coat all pieces evenly.

 With the mixer on low speed, alternately add the flour mixture and milk, in three additions, beginning and 
ending with the flour. Scrape down the sides of the bowl as needed.

Swirl in most of the apples, reserving about a 1/2 cup for garnish.
 Scoop into prepared muffin pan and bake for about 18-20 minutes, or until set and toothpick inserted into center comes out clean.
 Cool completely, then frost with buttercream (caramel optional) or other favorite frosting, and garnish with apple pieces. 


Makes 18-24 cupcakes.


Caramel Pecan Sundaes

You scream I scream.

My residents love ice cream. Almost daily, someone will order ice cream as an alternative to the featured dessert. When ice cream is the headliner, I don't get any complaints. It's cold, it's smooth, it's creamy, it's easy to eat, it's easy to serve, what's not to love about ice cream? If we had an ice cream maker at work, I would make it myself, and perhaps someday we will get one, but for now, store bought is just fine.

We all scream for ice cream!

I got this caramel sauce recipe from culinary school- I have made it countless times, and it has never failed me. Once you get the hang of it, you won't need to measure, just wing it. It's extremely versatile- you can make it as dark (bitter) or light (sweet) as you want, and incorporate additions, such as beer or rum. And it keeps for weeks (refrigerated) so you can always have it on hand!

Caramel Sauce
yield: 2 1/2 cups

ingredients:
8 ounces sugar
3 ounces water
8 ounces heavy cream, hot
pinch salt ( I like my caramel salty, so I add more to taste )
1-2 tablespoons butter

directions:
Place the water, then sugar, into a (medium or large) saucepan, cover a heat over medium until the sugar syrup goes clear. Do not stir! Resist the urge! Once all the sugar is dissolved, remove lid, raise the heat to high, and boil off the water as quickly as possible. Cook to a medium dark caramel, lowering or turning off the heat towards the end to prevent burning. Remove from heat and slowly add the hot cream and salt to caramel, stirring to prevent boiling over. Stir until the sauce is a uniform consistency. Stir in butter. Store refrigerated in a covered container (I use a squirt bottle).

Candied Nuts
yield: about 3 cups

ingredients:
3 cups pecan halves or other nuts
1 large egg white, lightly beaten
1/2 cup sugar, brown sugar, honey or maple syrup
1 teaspoon spices- cinnamon and nutmeg or other combination

directions:
Preheat oven to 300 degrees Farenheit. Toss nuts with egg whites in a large bowl. Srpinkle with spices and toss to coat thoroughly. Spread onto a sheetpan and bake, stirring occasionally to ensure even baking, for about 30 minutes. Cool and store airtight for up to 2 weeks.

Caramel Pecan Sundaes-
If you have any caramel sauce and nuts leftover, not to mention ice cream, you can make your old folks (and yourself) a caramel pecan ice cream sundae: Just put them together. Whipped cream optional.


three simple components: vanilla ice cream with homemade caramel sauce and candied pecans

Tuesday, February 1, 2011

Date Topped Brownies

Now, this making two daily desserts business is not an easy feat. I have to be creative and try new ideas (that don't always work) and keep coming up with new ones. I don't like to do the same dessert twice, even if they love it. I will eventually, but I don't want to get stuck in a rut where I keep baking the same things from my little stockpile of pastries. So I am building a binder, my pastry arts binder, meticulously organized, of all desserts I have tried and that were successes. There are recipes from culinary school, from my grandma, things I've tried at home, and every recipe that has won a victory at work. So onto to the successful experiment of date brownies- who just made it into my binder.
I found dates at work in the dried fruit box. I had already used the dried cranberries, raisins, cherries... So I tasted a date. I'm not sure if I had ever had one before, but this blew my mind. It was a heavenly shriveled up lump of sweetness, and I had to use it.

I usually would use my little iPhone screen to look up recipes, but I didn't have time. It was already 7:00 AM, and the menu goes out by 7:30- and I had breakfast items to prepare. I quickly searched around, saw the cocoa powder, remembered there was some left-over chocolate frosting I was suppose to use, and decided on brownies. At that point I had not decided whether I was going to put them inside or just on top- but I had something to put on the menu.

I would have called these "date brownies," but then the assumption might have been that they are a healthier brownie version- made with "date sugar," and they are not. I'm sure that would be great though, and there are many diabetics amongst the elderly, so I will try (someday) and get back to you with that recipe as well.

Date Topped Brownies

brownies:
1/2 cup vegetable oil
1 cup sugar
1 teaspoon vanilla extract
2 eggs
1/2 cup flour
1/3 cup cocoa powder
1/4 teaspoon baking powder
1/4 teaspoon salt
(1/2 cups chopped dates)
frosting:
2 3/4 cups confectioners' sugar
6 tablespoons cocoa powder
6 tablespoons butter, at room temperature
5 tablespoons evaporated milk
1 teaspoon vanilla extract
Dates for topping (1 per brownie)

Preheat oven to 350 degrees Fahrenheit.
Grease a 9x9 inch baking pan.
Mix together oil, sugar and vanilla, then beat in the eggs.
Combine flour, cocoa powder, baking powder and salt, then stir into sugar mixture.
Stir in chopped dates, if using.
Spread into prepared pan, and bake 20-25 minutes.

Meanwhile, prepare the frosting:
Mix together the cocoa powder and confectioners' sugar.
Cream the butter with an electric mixer until smooth, then gradually add sugar mixture alternately with evaporated milk.
Add vanilla, then beat until light and fluffy. Consistency may be adjusted with more milk or sugar.

When brownies are cooled, cut into squares, frost and top each with a whole date.

Enjoy with your favorite seniors!

Chicken Lemon Rice Soup

My mother always made this when someone in our family was sick. When I first moved out, I didn't live too far away, so everytime I got sick, I'd just go stay with her and she'd make it for me. It wasn't until recently that my boyfriend and I moved halfway across the country, and when one of us got sick, and I finally asked for her recipe.

It's soup, not an exact recipe (more like guidelines). So you can add more of this and less of that if you want. And play with it. I use leftovers sometimes, when I have rice I need to use, or chicken carcasses, I'll make home made stock, which is so much richer, but when someone gets sick, and I don't have anything to use, I'll make it from scratch. It's become a favorite at home, as well as with the elderly (who are often sick). It's a feel-better soup.

Chicken Lemon Rice Soup

2 chicken breasts, cut into bite-sized cubes
vegetable oil or butter
1 small yellow onion, small diced
6 cups chicken broth
3 tablespoons lemon juice
1 cup rice (uncooked)
1 medium carrot, shredded (or small diced)
salt and pepper
dried parsley

Season and cook chicken pieces until done, set aside.
Sweat the onions, until translucent, in a small amount of vegetable oil or butter and salt. (If dicing the carrot, add now).
Add stock and lemon juice and bring to a simmer.
Add rice, and simmer until rice is cooked through, about 20 minutes.
Add shredded carrots, chicken and dried parsley.
Season to taste.

Monday, January 31, 2011

Starch

Starch: No meal is complete without it
I always thought my first job in assisted living was the best, revolutionary even. I had the idea that all facilities and homes served pre-made packaged and frozen foods. And most of them do. But Fairhaven Estates was different. They hired real cooks and made foods from scratch. Sure we had white cake mix that we'd use- adding cocoa powder or flavored extracts to change the flavor- frozen fish fillets, and a few other items, but almost everything was handmade. We peeled and diced and boiled the potatoes for mashed potatoes and potato salad, we scrubbed the skins for baked potatoes, we washed the little red guys for herb roasted red potatoes, we sliced them thin for scalloped, julienned for fries...  But all we had were potatoes. Everyday. We might have a great entree, fried chicken (with potatoes), baked ham (with potatoes), pot roast (with potatoes), but always (with potatoes). We had the occasional sweet potato fries, and even mashed sweet potatoes (along with mashed potatoes) for Thanksgiving feasts, but that's it. Potatoes.

I did ask my boss why once, he said most of the residents hated rice and spaghetti (they called any form of pasta spaghetti, regardless of shape). I took it as truth and forgot about it- quickly learning how to prepare potatoes every way, and just as quickly deciding I hated them.

I still believed it, up until my current job. I had almost forgotten about other starches, even ones I prepared at home but that didn't register in my brain for one reason or another. Then I encountered the "starch" box at work. My head chef keeps everything very organized; if you are looking for nuts in dry storage, check the nut box, flour- check the grain box. The potatoes (and sweet potatoes) are in a large box on the bottom shelf. But ah... the starch box. Polenta, long grain white rice, arborio rice, wild rice, brown rice, quinoa, bulgur, barley, millet, wheat berries... the list goes on. Next to the starch box, and closely related, we have the pasta box- filled to the brim with all shapes of noodles- spaghetti, lasagna, couscous, cavatappi, egg noodles, elbow macaroni, shells.... All avaliable to prepare and serve with the entree (or soup, or salad, or even dessert).

And the residents love it. They don't want potatoes all the time either! They are still human beings with the same (though slightly weaker) taste buds! Yes- potatoes can be yummy, and seniors do love them, but not everyday.

I totally understand the distaste for spaghetti (the actual spaghetti, angle hair, capellini, linguine and other long pastas)- the long awkward shapes, hard for trembling hands to swirl onto a fork, that slide too easily down your throat, before chewing, and can be hazardous. I myself have choked on spaghetti more times than I'd like to recall. But there are so many pasta shapes! I really like to use the short, flat, wide egg noodles- they have a unique flavor and are both easy to pick up and to eat- great for Stroganoff and casseroles, plus, I always use them when I make chicken noodle soup.

I think a lot of elderly residents dislike rice for the same reason, not that it's hard to swallow, but that it is harder to pick up with a fork. It also tends to get everywhere, so serving in a bowl might make clean-up easier. Risotto is an option too- it sticks together, making it much easier to pick up, and it's creamy and flavorful.

Of all the many grains, I have had the best luck with polenta. It's thick, creamy, and soft, and can be seasoned many ways. The residents love it; it sticks together, sticks to their utensils, stays on their plates (not the floor), is easy to chew (though not necessary) and easy to swallow, and just plain delicious. I usually stir in hot cream and Parmesan cheese at the end, or sauteed onions, mushrooms and thyme ( also one of my favorite risotto combinations). You can prepare it with water or a flavorful stock- just don't forget the salt!

Whatever starches you choose to accompany your meals,  be sure to use a variety. Be open to new breeds and try new recipes. And don't forget about the potato!

Sunday, January 30, 2011

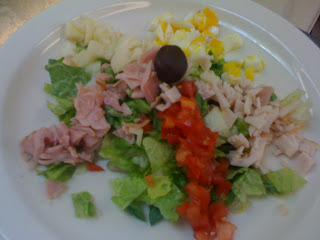
Lettuce Salads


Salads seem to be an uncommon part of the senior diet. Lettuce can be hard to chew and swallow, and it wasn't a common food back in the day when our current old folks were youngin's.(Click for Brief Salad History)

In previous homes I've worked in, dinner salads were unheard of, and the salad bar's lettuce and fresh vegetables would go unnoticed next to canned beets, jello and fruit cocktails.

One of my grandfather's chief complaints about senior food was lack of lettuce. He had quite the palate for an 80-sum year-old.  Other than enjoying a giant cookie and beer that my mother would sneak into his nursing facility, he loved a fresh crisp salad. And I know there are more seniors out there with taste buds like Papa Bob.

At my current place of work, we make entre salads at least once a week and small side salads almost daily, with few complaints.

Several of my residents are missing entire sets of teeth, which make chewing rather difficult. For these residents, and others with chewing and swallowing problems, I chop the lettuce or salad greens up very small. For seniors I chop it up small anyways, but for these special cases I mean really tiny. And then I chop up all the toppings just as little. Presentation is still important though, (you eat with your eyes before you eat with your mouth) so I arrange the confetti of toppings on in an attractive manner.

So don't let a few sour apples spoil salads for everyone.  I have one resident who won't eat lettuce, but she'll eat the rest of the salad, so I make her a special plate without it. If you're working in a community, I urge you to give it a try and see how it goes over. Get feedback. If you're cooking for less, say a parent, grandparent or personal client, ask them how they feel about salads- see what they like and don't like about them. We're here cater to their dietary desires, and it's easy to make a few adjustments.

A note about...
Onions: Lots of people in the general public do not like raw onions. The senior population is no different. Be wary.
Bell Peppers: I've heard complaints from several elderly residents that these wreak havoc on their digestive systems. Use sparingly.
The Foundation: There is so much more variety of amazing greens on which to build your salad than iceberg lettuce. Try spinach, mixed greens, romaine, bib lettuce, and others- they actually all have unique flavors and textures.

Jam Swirled Coffee Cake

The seniors I work with love fruity desserts- be they thumbprint cookies with preserves, strawberry shortcake, crisps, pies or cobblers. And jam swirled coffee cake is no exception. I came across the recipe in an online search for a new dessert to make, and they liked it more than I ever would have expected- I'm not sure if it was due to the extra large pieces I served, that they were in a extra good mood, or that it really is just that good.

So bake some cake for your favorite seniors and serve with (decaf) coffee.


Jam Swirl Coffee Cake

(Click for Original Recipe)

Ingredients:

  • 2 cups sifted all-purpose flour
  • 1/2 cup sugar
  • 1 tablespoon baking powder
  • 1/2 teaspoon salt
  • 1/3 cup butter (5 tablespoons plus 1 teaspoon)
  • 1 egg, beaten
  • 3/4 cup milk
  • 1 cup of your favorite jam, jelly or preserves (I used grape jelly!)

Topping:
  • 2/3 cup light brown sugar, firmly packed
  • 2 tablespoons flour
  • 2 tablespoons butter
  • 1/2 cup chopped walnuts or pecans*

Preparation:

Into a medium bowl, sift together flour, sugar, baking powder, and salt. Cut in butter with pastry blender to make a fine crumbly mixture. Add egg and milk; stir just until dry ingredients are moistened. Spoon batter into a generously buttered 9-inch square pan. Spoon jam over the batter, then swirl through the batter with a knife. Mix topping ingredients with fork or fingers until crumbly and sprinkle evenly over batter. Bake at 400° for 25 to 30 minutes, until done. Cut into squares and serve while still warm.
Makes about 9 squares

*I have a resident with nut allergies, so I omitted the nuts in the streusel topping
.